How to Create Stunning Map Animations for YouTube Videos
Learn how to create professional map animations that will make your YouTube videos stand out. Step-by-step guide for content creators.
Preview & Editor advantage
Draft with AI prompts or templates, then refine every animation step in real time (zoom, opacity, border width, colors, bearing, tilt). Credits are used only when you render the final video.
Animaps Team
Content Creator
How to Create Stunning Map Animations for YouTube Videos
Last updated: January 15, 2024
TL;DR
Map animations are one of the highest-engagement visual elements you can add to YouTube videos. They establish location, create visual hooks, and make complex geographic stories easy to follow. With AI-powered tools like Animaps, you can create broadcast-quality map animations in 60-90 seconds — no After Effects, no design skills, no learning curve.
What you will learn:
- Why map animations boost YouTube engagement
- How to choose the right format and aspect ratio
- Step-by-step workflow for creating map animations
- Tips for thumbnails, hooks, and YouTube SEO
- How to integrate maps into your editing workflow
Related reading:
- Map animation maker hub: Create animated maps online
- Comparison hub: Map animation maker alternatives
Map animations are one of the most engaging visual elements you can add to your YouTube videos. Whether you are explaining geography, history, travel routes, or global trends, animated maps capture your audience's attention and make complex information easy to understand.
Channels like Vox, Johnny Harris, RealLifeLore, and Wendover Productions have proven that map animations drive views. Their most-viewed videos almost always feature compelling geographic visuals.
This guide shows you how to create professional map animations for your YouTube channel — step by step, from planning to export.
For the latest tools and trends, also check out our 2026-specific YouTube guide.
Why Map Animations Work on YouTube
The Engagement Factor
YouTube's algorithm rewards watch time. Map animations increase watch time in three ways:
- Visual hooks: A smooth zoom from space to a specific city grabs attention in the first 3 seconds
- Clarity: Complex geographic stories become instantly understandable
- Pacing: Map transitions break up talking-head segments and maintain visual variety
The Retention Factor
Audience retention graphs tell the story. Videos with map animations show:
- Higher average view duration (viewers stay to see where the map goes)
- Fewer drop-off points during geographic explanations
- More replays (viewers rewatch to absorb geographic details)
What Top Creators Know
The most successful geography and travel channels use map animations strategically:
- As hooks: The first 5 seconds show a dramatic map zoom
- As transitions: Maps connect one location segment to the next
- As explainers: Maps replace paragraphs of verbal geographic description
- As outros: Maps summarize the journey or topic at the end
Choosing the Right Format
Aspect Ratio
| Format | Aspect Ratio | Best For |
|---|---|---|
| Standard YouTube | 16:9 | Main channel videos, long-form content |
| YouTube Shorts | 9:16 | Short-form vertical content |
| Community posts | 1:1 or 16:9 | Engagement posts, teasers |
Always decide your aspect ratio before creating the animation. Re-exporting in a different ratio wastes time and credits.
Animaps supports all three ratios: 16:9, 9:16, and 1:1. Choose before you export.
Resolution
| Resolution | When to Use |
|---|---|
| 1080p (1920x1080) | Standard for all YouTube content. Use this by default. |
| 720p (1280x720) | Acceptable for smaller embeds or when file size matters |
YouTube recommends uploading at the highest quality available. Always export at 1080p unless you have a specific reason not to.
Frame Rate
| Frame Rate | When to Use |
|---|---|
| 30fps | Standard for most content. Smooth and efficient. |
| 60fps | Fast camera movements, orbit animations, premium feel |
Pro tip: If your video is 30fps, export map animations at 30fps. Mixing frame rates can cause stuttering.
Step-by-Step: Creating Your First Map Animation
Step 1: Plan Your Animation (2 minutes)
Before opening any tool, answer three questions:
- What location(s) do I need to show?
- Single country/city: simple zoom + highlight
- Multiple locations: route or multi-scene animation
- Region overview: wide zoom with multiple highlights
- What story am I telling with this map?
- "This happened HERE" (establishing shot)
- "The journey went from A to B to C" (route animation)
- "These countries are involved" (multi-highlight)
- "The border/territory changed over time" (timelapse)
- How long should the animation be?
- Hook/intro: 3-5 seconds
- Transition: 2-4 seconds
- Explainer segment: 8-20 seconds
- Deep dive: 20-60 seconds
Step 2: Create the Animation (60-90 seconds)
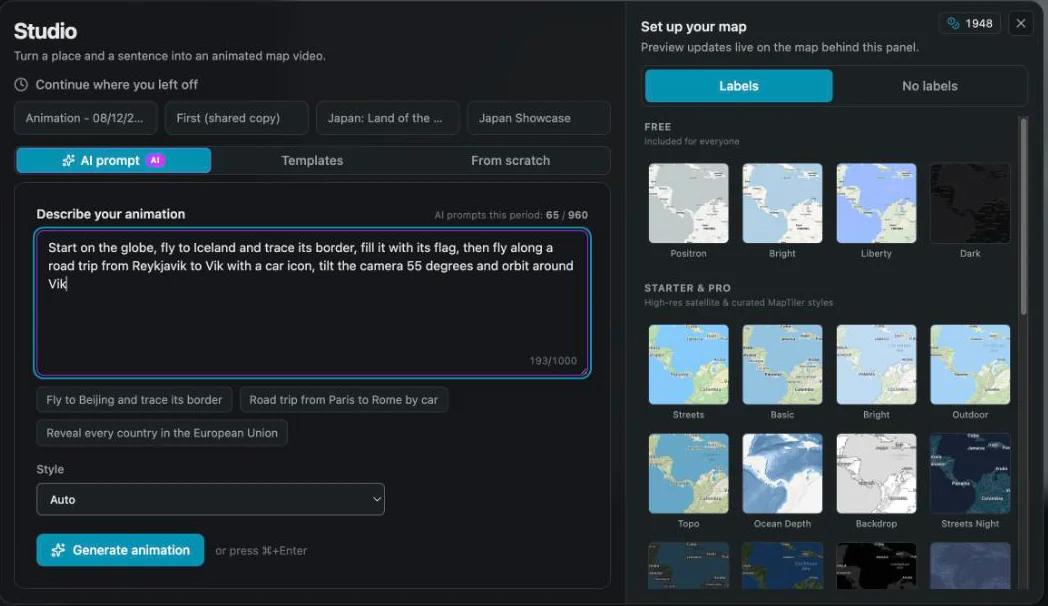
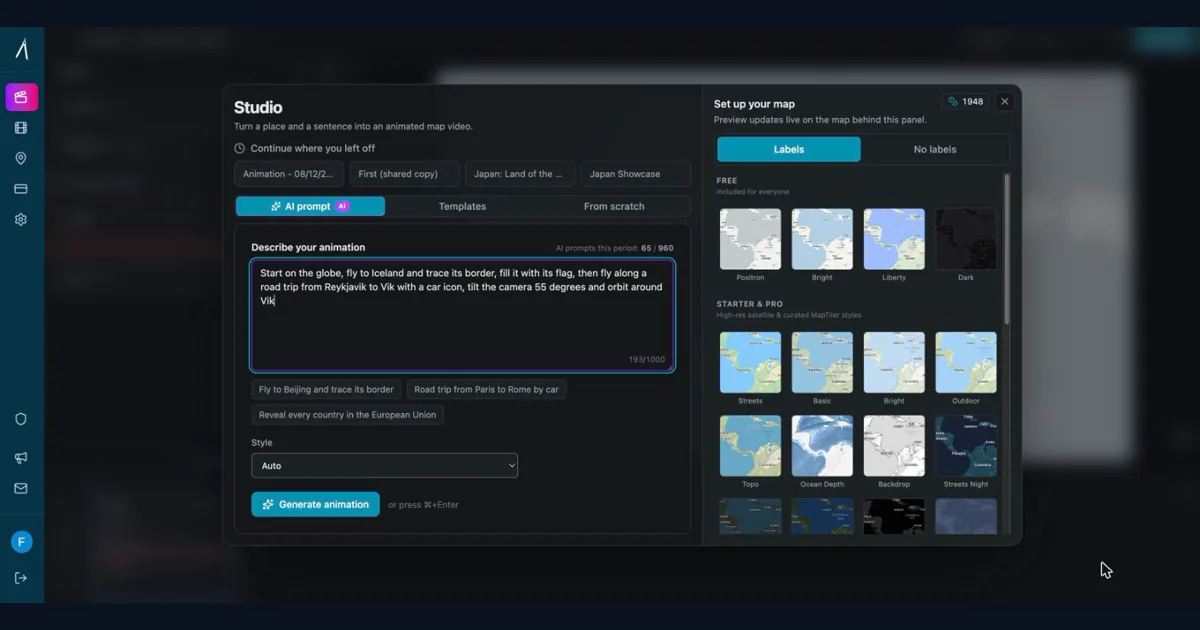
Open Animaps and type your prompt in natural language.
For a travel video intro: "Start from the world, zoom to Southeast Asia, fly to Bangkok, add Thai flag, orbit around the city"
For a history explainer: "Zoom to Europe, highlight France, Germany, and UK, trace borders, add labels for Paris, Berlin, and London"
For a geopolitics video: "Zoom to the South China Sea, highlight the disputed islands, add labels, tilt camera 45 degrees"
Click Generate. The AI creates a full animation from your prompt, including:
- Smooth camera movements
- Geographic locations from a 180,000+ database
- Visual elements (flags, icons, labels, borders)
- Professional timing and easing
Preview plays immediately. No rendering wait.
Step 3: Refine in the Editor (2-5 minutes, optional)
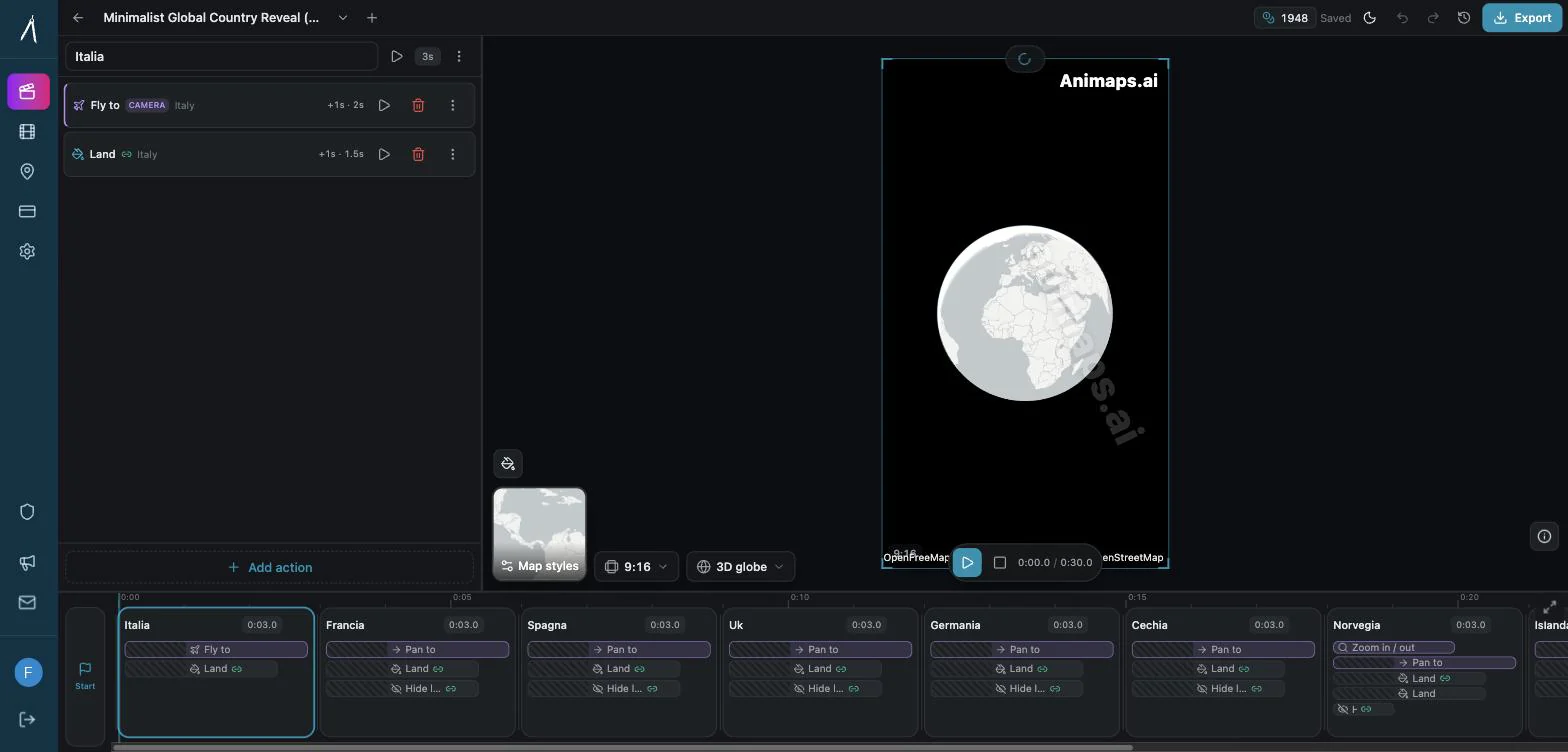
If the AI result is 90% right, use the step editor to fine-tune:
Common adjustments:
- Timing: Extend or shorten specific steps
- Camera angle: Adjust tilt for a more cinematic look
- Colors: Change highlight colors to match your brand
- Labels: Add, remove, or reposition text
- Scenes: Run multiple animations simultaneously for complex visuals
Previewing and editing does not cost credits. Only exporting does. So iterate freely until it looks perfect.
Step 4: Export (30-60 seconds)
Choose your settings:
- Format: MP4 (recommended for YouTube) or GIF (for thumbnails/social)
- Resolution: 1080p
- Aspect ratio: 16:9 for standard video, 9:16 for Shorts
- Frame rate: Match your video project (usually 30fps)
Cloud GPU rendering produces your file in 30-60 seconds.
Step 5: Import into Your Video Editor (1 minute)
Drop the exported MP4 into your timeline in:
- Premiere Pro — drag to timeline, trim edges
- DaVinci Resolve — import to media pool, add to timeline
- Final Cut Pro — import and place on timeline
- CapCut — works great for Shorts
Pro tip: Export your map animation slightly longer than needed (add 1-2 seconds of buffer at start and end). This gives you room to trim and cross-dissolve in your editor.
7 Types of Map Animations for YouTube
1. The Establishing Shot
What: Zoom from a wide view down to a specific location. When: Opening of a video or segment to show where the story takes place. Duration: 3-5 seconds.
Prompt example: "Start from the world, zoom to Japan, fly to Tokyo"
Why it works: Immediately grounds your audience in a specific place. The dramatic zoom creates a sense of arrival.
2. The Travel Route
What: Trace a path between multiple locations. When: Travel vlogs, historical journeys, supply chain explainers. Duration: 8-20 seconds.
Prompt example: "Show Europe, trace a travel route from London to Paris to Rome to Athens with a plane icon"
Why it works: Shows the scale of a journey and connects separate video segments geographically.
3. The Comparison Highlight
What: Highlight multiple countries or regions in different colors. When: Geopolitics, economics, cultural comparisons. Duration: 5-15 seconds.
Prompt example: "Zoom to Asia, highlight Japan in blue and South Korea in red, add labels for Tokyo and Seoul"
Why it works: Makes abstract comparisons visually concrete.
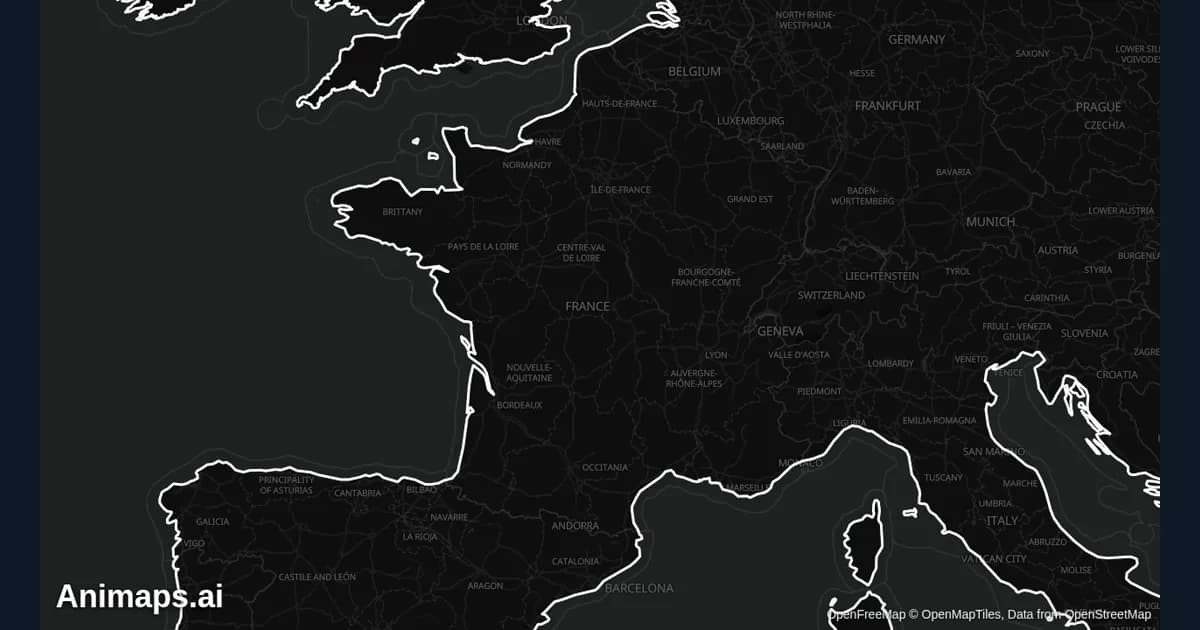
4. The Border Trace
What: Animate a country's [border being drawn](/guide/map-border-animation). When: Geography explainers, country profiles, history videos. Duration: 5-10 seconds.
Prompt example: "Zoom to France, trace the border of France, fill with blue"
Why it works: Draws attention to the shape and extent of a country. More engaging than a static highlight.
5. The Orbit/Flyover
What: Camera orbits around a location or tilts for a cinematic angle. When: Dramatic establishing shots, city features, landmark videos. Duration: 5-15 seconds.
Prompt example: "Zoom to New York City, tilt camera 60 degrees, orbit around Manhattan"
Why it works: Creates a cinematic feel. The 3D globe render makes it look like professional broadcast graphics.
6. The Historical Timelapse
What: Show how borders or territories changed over time. When: History channels, geopolitics explainers. Duration: 10-30 seconds.
Prompt example: "Show Europe, border timelapse from 1900 to 2000"
Why it works: Compresses decades of change into seconds. Extremely engaging for history content.
7. The Multi-Scene
What: Multiple animations running simultaneously (e.g., zoom while highlighting while adding labels). When: Complex geographic stories, professional-grade content. Duration: 10-30 seconds.
Prompt example: "Zoom to the Middle East while highlighting Iraq and Iran, add labels for Baghdad and Tehran, tilt camera 45 degrees"
Why it works: Produces broadcast-quality visuals that rival major news networks.
YouTube SEO and Map Animation Content
Titles That Include Geographic Keywords
Videos with geographic specificity in titles tend to rank for location-based searches.
Examples:
- "Why Japan's Geography Is Insane" (location + intrigue)
- "The Route From London to Sydney — Every Stop Explained" (route + promise)
- "How Africa's Borders Were Drawn" (region + question)
Thumbnails with Map Elements
Map frames from your animation can make effective thumbnails:
Tips:
- Export a GIF and screenshot the most visually striking frame
- Add text overlay in your thumbnail editor
- Use high-contrast map colors that stand out in search results
- Show enough of the map to be recognizable but add intrigue
Descriptions and Tags
Include geographic terms in your video description:
- Name every country/city mentioned in the video
- Include "map animation" and "animated map" as phrases
- Reference the specific geographic topic
Chapters with Geographic Segments
Use YouTube chapters to mark each geographic section:
0:00 Introduction
0:30 Where Is [Country]? (map animation)
1:15 History of [Region]
3:00 The Route From A to B (map animation)
5:30 Why Geography Matters
Chapters with map animations create clear visual markers in the timeline scrubber, encouraging viewers to explore the full video.
Integration Tips for Popular Video Editors
Adobe Premiere Pro
- Import the MP4 file to your project
- Drag to your timeline above your main footage track
- Use cross-dissolve transitions (15-30 frames) at cut points
- Scale and position if needed (Effect Controls > Motion)
- Add a subtle drop shadow if placing over other footage
DaVinci Resolve
- Import to Media Pool
- Place on a track above your main footage
- Use Fusion for advanced compositing if needed
- Add Smooth Cut transitions for clean entries/exits
- Color match with your footage using the Color page
Final Cut Pro
- Import the MP4 to your event
- Place as a connected clip above your primary storyline
- Use cross-dissolve transitions
- Adjust opacity and blend mode if compositing over footage
CapCut (for Shorts)
- Import the 9:16 export
- Place on the timeline
- Trim to exact length
- Add text overlays using CapCut's text tools
- Export directly to YouTube Shorts
Pro Tips From Successful Creators
Tip 1: Create a Map Animation Template Library
If you make videos about the same regions regularly, save your base animations:
- Travel channel: Save establishing shots for your top 10 destinations
- History channel: Save base maps for Europe, Asia, Africa, Americas
- News channel: Save templates for current conflict zones and hot spots
Modify templates for each video instead of creating from scratch. Goes from 60 seconds to 15 seconds per animation.
Tip 2: Match Map Style to Your Brand
Consistency builds channel identity. Decide on:
- Map color scheme: Match your channel colors
- Animation pacing: Fast for energetic channels, slower for educational
- Camera angle: Flat maps feel analytical, tilted 3D globes feel cinematic
- Label style: Clean and minimal, or bold and detailed
Tip 3: Use Maps as B-Roll, Not Just Explainers
Map animations work as visual variety even when you are not explaining geography:
- Cut to a map during voiceover to maintain visual interest
- Use a slow zoom as background behind text
- Show a map orbit during a music transition
Tip 4: Export Multiple Versions
For each map animation, consider exporting:
- 16:9 at 1080p — for the main video
- 9:16 at 1080p — for a YouTube Short or Instagram Reel teaser
- GIF — for community posts and social media
You create the animation once and export it in multiple formats.
Tip 5: Keep Animations Under 15 Seconds (Usually)
Long map animations lose viewers. The sweet spot for YouTube is:
- 3-5 seconds: Quick establishing shots and transitions
- 8-12 seconds: Moderate explainer segments
- 15-20 seconds: Maximum for complex sequences
If your map sequence needs to be longer than 20 seconds, break it into multiple cuts with voiceover or B-roll between them.
Tip 6: Add Sound Design
Map animations come alive with audio:
- Whoosh sound on camera zooms
- Subtle click when labels appear
- Low ambient tone during orbits
- Transition sound when cutting to/from the map
Most stock music libraries (Epidemic Sound, Artlist) include UI/motion graphics sound effects that work perfectly with map animations.
Tip 7: Use the First 3 Seconds
YouTube's algorithm weighs the first 3 seconds heavily for audience retention. A dramatic map zoom makes an effective cold open:
Script structure:
- (0-3 seconds) Map zoom from space to location — no talking
- (3-5 seconds) "This is [location], and something incredible happened here."
- (5-15 seconds) Brief context, then transition to your main content
This pattern hooks viewers visually before you have even started speaking.
Common Mistakes YouTube Creators Make
Mistake 1: Overproducing the Map
A 30-second cinematic map flyover with 15 camera angles is impressive the first time. By the third video, it feels self-indulgent. Keep maps functional, not decorative.
Mistake 2: Wrong Aspect Ratio
Creating a 16:9 animation and then trying to crop it to 9:16 for Shorts results in a map that is too zoomed in. Plan your aspect ratio from the start.
Mistake 3: Ignoring Mobile Viewers
Over 70% of YouTube watching happens on mobile devices. If your labels are too small to read on a phone screen, they are too small. Test by watching your animation on your phone before publishing.
Mistake 4: No Voiceover During the Map
A silent map animation with no narration is a missed opportunity. Your voice guides the viewer's attention and adds context that the visual alone cannot provide.
Mistake 5: Inconsistent Map Style Across Videos
Your audience should recognize your maps as "yours." If every video has a different map style, color scheme, and animation speed, you lose brand consistency.
Workflow Cheat Sheet
Quick Establishing Shot (2 minutes total)
- Open Animaps map animation maker (10 seconds)
- Type: "Zoom to [location]" (5 seconds)
- Generate and preview (15 seconds)
- Export 16:9 1080p MP4 (45 seconds)
- Import to timeline (30 seconds)
Travel Route Animation (5 minutes total)
- Plan your stops (1 minute)
- Type prompt with all locations (30 seconds)
- Generate and preview (30 seconds)
- Adjust timing and camera in editor (2 minutes)
- Export (45 seconds)
Complex Multi-Scene (10 minutes total)
- Plan the sequence (2 minutes)
- Create initial prompt (1 minute)
- Generate and preview (30 seconds)
- Fine-tune each step in editor (5 minutes)
- Export (90 seconds)
Getting Started Today
Step 1: Create Your Free Account
Visit animaps.ai and sign up. No credit card required. The free tier gives you 12 credits per month — enough to test the workflow and create your first video.
Step 2: Create Your First Map
Type a prompt relevant to your channel:
- Travel channel: "Zoom to [your next destination]"
- History channel: "Zoom to [your current topic's region]"
- News channel: "Zoom to [current event location], highlight [country]"
Step 3: Export and Use
Export at 16:9, 1080p, 30fps. Drop it into your next video.
Step 4: Build Your Library
Over the next few videos, build a library of establishing shots, transitions, and explainer animations. Each one takes 60-90 seconds. After a month, you will have a reusable library that makes every future video faster.
The Bottom Line
Map animations are no longer optional for YouTube creators who cover geography, travel, history, or current events. They are table stakes for professional-looking content.
The barrier that used to exist — expensive software, months of learning, hours of production per animation — is gone. AI-powered tools create broadcast-quality results in 60-90 seconds.
The creators who will stand out in 2026 and beyond are not the ones with the fanciest animations. They are the ones who use maps strategically: to hook viewers, to clarify complex stories, and to maintain visual engagement throughout their videos.
Start simple. One establishing shot per video. Build from there.
Start creating:
- Free: 12 credits/month, all features, no credit card
- All export formats: MP4, GIF, 16:9, 9:16, 1:1, 720p, 1080p
- Create your first YouTube map animation: animaps.ai
Related Articles:
Keywords: map animations for YouTube, YouTube map animation tutorial, create animated maps for videos, YouTube travel map, map animation video editing, how to add maps to YouTube videos, animated map maker for YouTube, YouTube geography animations, map animations for content creators
Tags
Related reading
How to Create Map Animations for YouTube Videos: The Complete 2026 Guide
Map animations have become the secret weapon of successful YouTube creators. From travel vloggers showcasing epic journeys to educational channels explaining world events, animated maps transform dry geographic information into captivating visual stories that keep viewers engaged. Vox's channel grew from 50,000-150,000 daily views to 1-3 million daily views after they started incorporating more map animations into their content.
How to Create Professional Map Animations in 60 Seconds (No Experience Required)
Most map animation tools require 30-60 minutes per video. After Effects demands hours of work plus months of learning. Animaps creates professional map animations in 60 seconds using natural language commands. Just type what you want, preview instantly, and export. This guide shows you exactly how the 60-second workflow works with real examples.
10 Ways Travel Bloggers Use Animated Maps (And How You Can Too)
Travel bloggers face a unique challenge: how do you make someone *feel* a journey they haven't taken? Static photos show destinations. Written stories describe experiences. But animated maps? **They transport viewers into your journey**, transforming passive readers into active participants following along your path. In 2026, animated maps have evolved from nice-to-have embellishments to essential storytelling tools.
Browse every article in the Animaps blog.