How to Create Map Animations for YouTube Videos: The Complete 2026 Guide
The ultimate guide to creating professional map animations for YouTube. Learn from Vox and Johnny Harris's techniques using After Effects, Google Earth Studio, online tools, and AI-powered solutions.
Preview & Editor advantage
Draft with AI prompts or templates, then refine every animation step in real time (zoom, opacity, border width, colors, bearing, tilt). Credits are used only when you render the final video.
Animaps Team
Content Creator
How to Create Map Animations for YouTube Videos: The Complete 2026 Guide
Last updated: December 12, 2025
TL;DR
Four main approaches: (1) AI-powered tools such as Animaps.ai for instant map videos (60-90 sec, $0-19/month, 0 min learning), (2) After Effects + GEOlayers for maximum control (45-75 min/animation, 150+ hours learning, $449+/year), (3) Google Earth Studio for 3D terrain (20-40 min, requires approval), (4) Browser-based tools like Mapimator for manual control (5-15 min, $9-30/month).
Quick links:
- Map animation maker hub: Create animated maps online
- Comparison hub: Map animation maker alternatives
- Examples: Map animation examples gallery
Best choice depends on:
- Speed priority: AI-powered tools (60-90 seconds)
- Maximum control: After Effects + GEOlayers
- 3D terrain: Google Earth Studio
- Manual timeline editing: Browser-based tools
For most creators: Animaps.ai offers the best balance of speed, quality, and ease of use.
Map animations have become the secret weapon of successful YouTube creators. From travel vloggers showcasing epic journeys to educational channels explaining world events, animated maps transform dry geographic information into captivating visual stories that keep viewers engaged.
Vox's channel grew from 50,000-150,000 daily views to 1-3 million daily views after they started incorporating more map animations into their content. That's not a coincidence—map animations work.
In this comprehensive 2026 guide, we'll break down everything you need to know about creating professional map animations for YouTube, from beginner-friendly tools to advanced techniques used by channels with millions of subscribers.
Why Map Animations Matter for YouTube Success
The Visual Storytelling Advantage
Map animations are powerful tools that break down complex topics by transforming abstract geographic concepts into concrete visual narratives, helping creators stand out in a crowded field and simplifying complicated subjects.
Map animations help you:
- Establish context instantly - Show viewers exactly where events are happening
- Tell geographic stories - Transform routes, migrations, and expansions into engaging narratives
- Boost retention rates - Visual movement keeps viewers watching longer
- Increase production value - Professional maps make your channel look more credible
- Explain complex topics simply - Geographic relationships become immediately clear
Who Benefits Most?
Travel Vloggers & Bloggers:
- Show journey routes with animated paths
- Connect multiple destinations visually
- Create cinematic intros showing trip scope
Educational Content Creators:
- Illustrate historical events and movements
- Explain geopolitical situations clearly
- Teach geography with visual engagement
News & Commentary Channels:
- Break down current events with geographic context
- Show conflict zones and territorial changes
- Visualize economic or demographic data
Documentary Filmmakers:
- Add professional polish to storytelling
- Transition smoothly between locations
- Create cinematic establishing shots
Method 1: AI-Powered Tools (Animaps.ai for YouTube-Ready Map Animations)
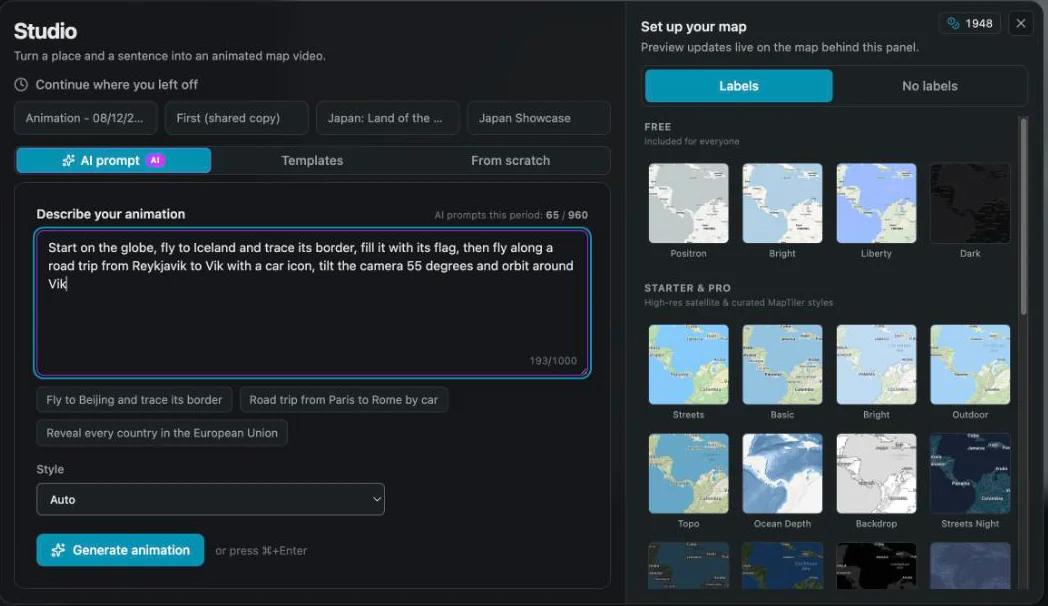
Animaps.ai is the AI-powered map animation studio built for YouTube creators who need polished results with no animation chops. Describe what you want in plain English, and Animaps.ai builds the entire camera journey, highlights countries, drops icons, and exports ready-to-upload video (9:16, 16:9, or 1:1).
Natural Language Map Animation Tools
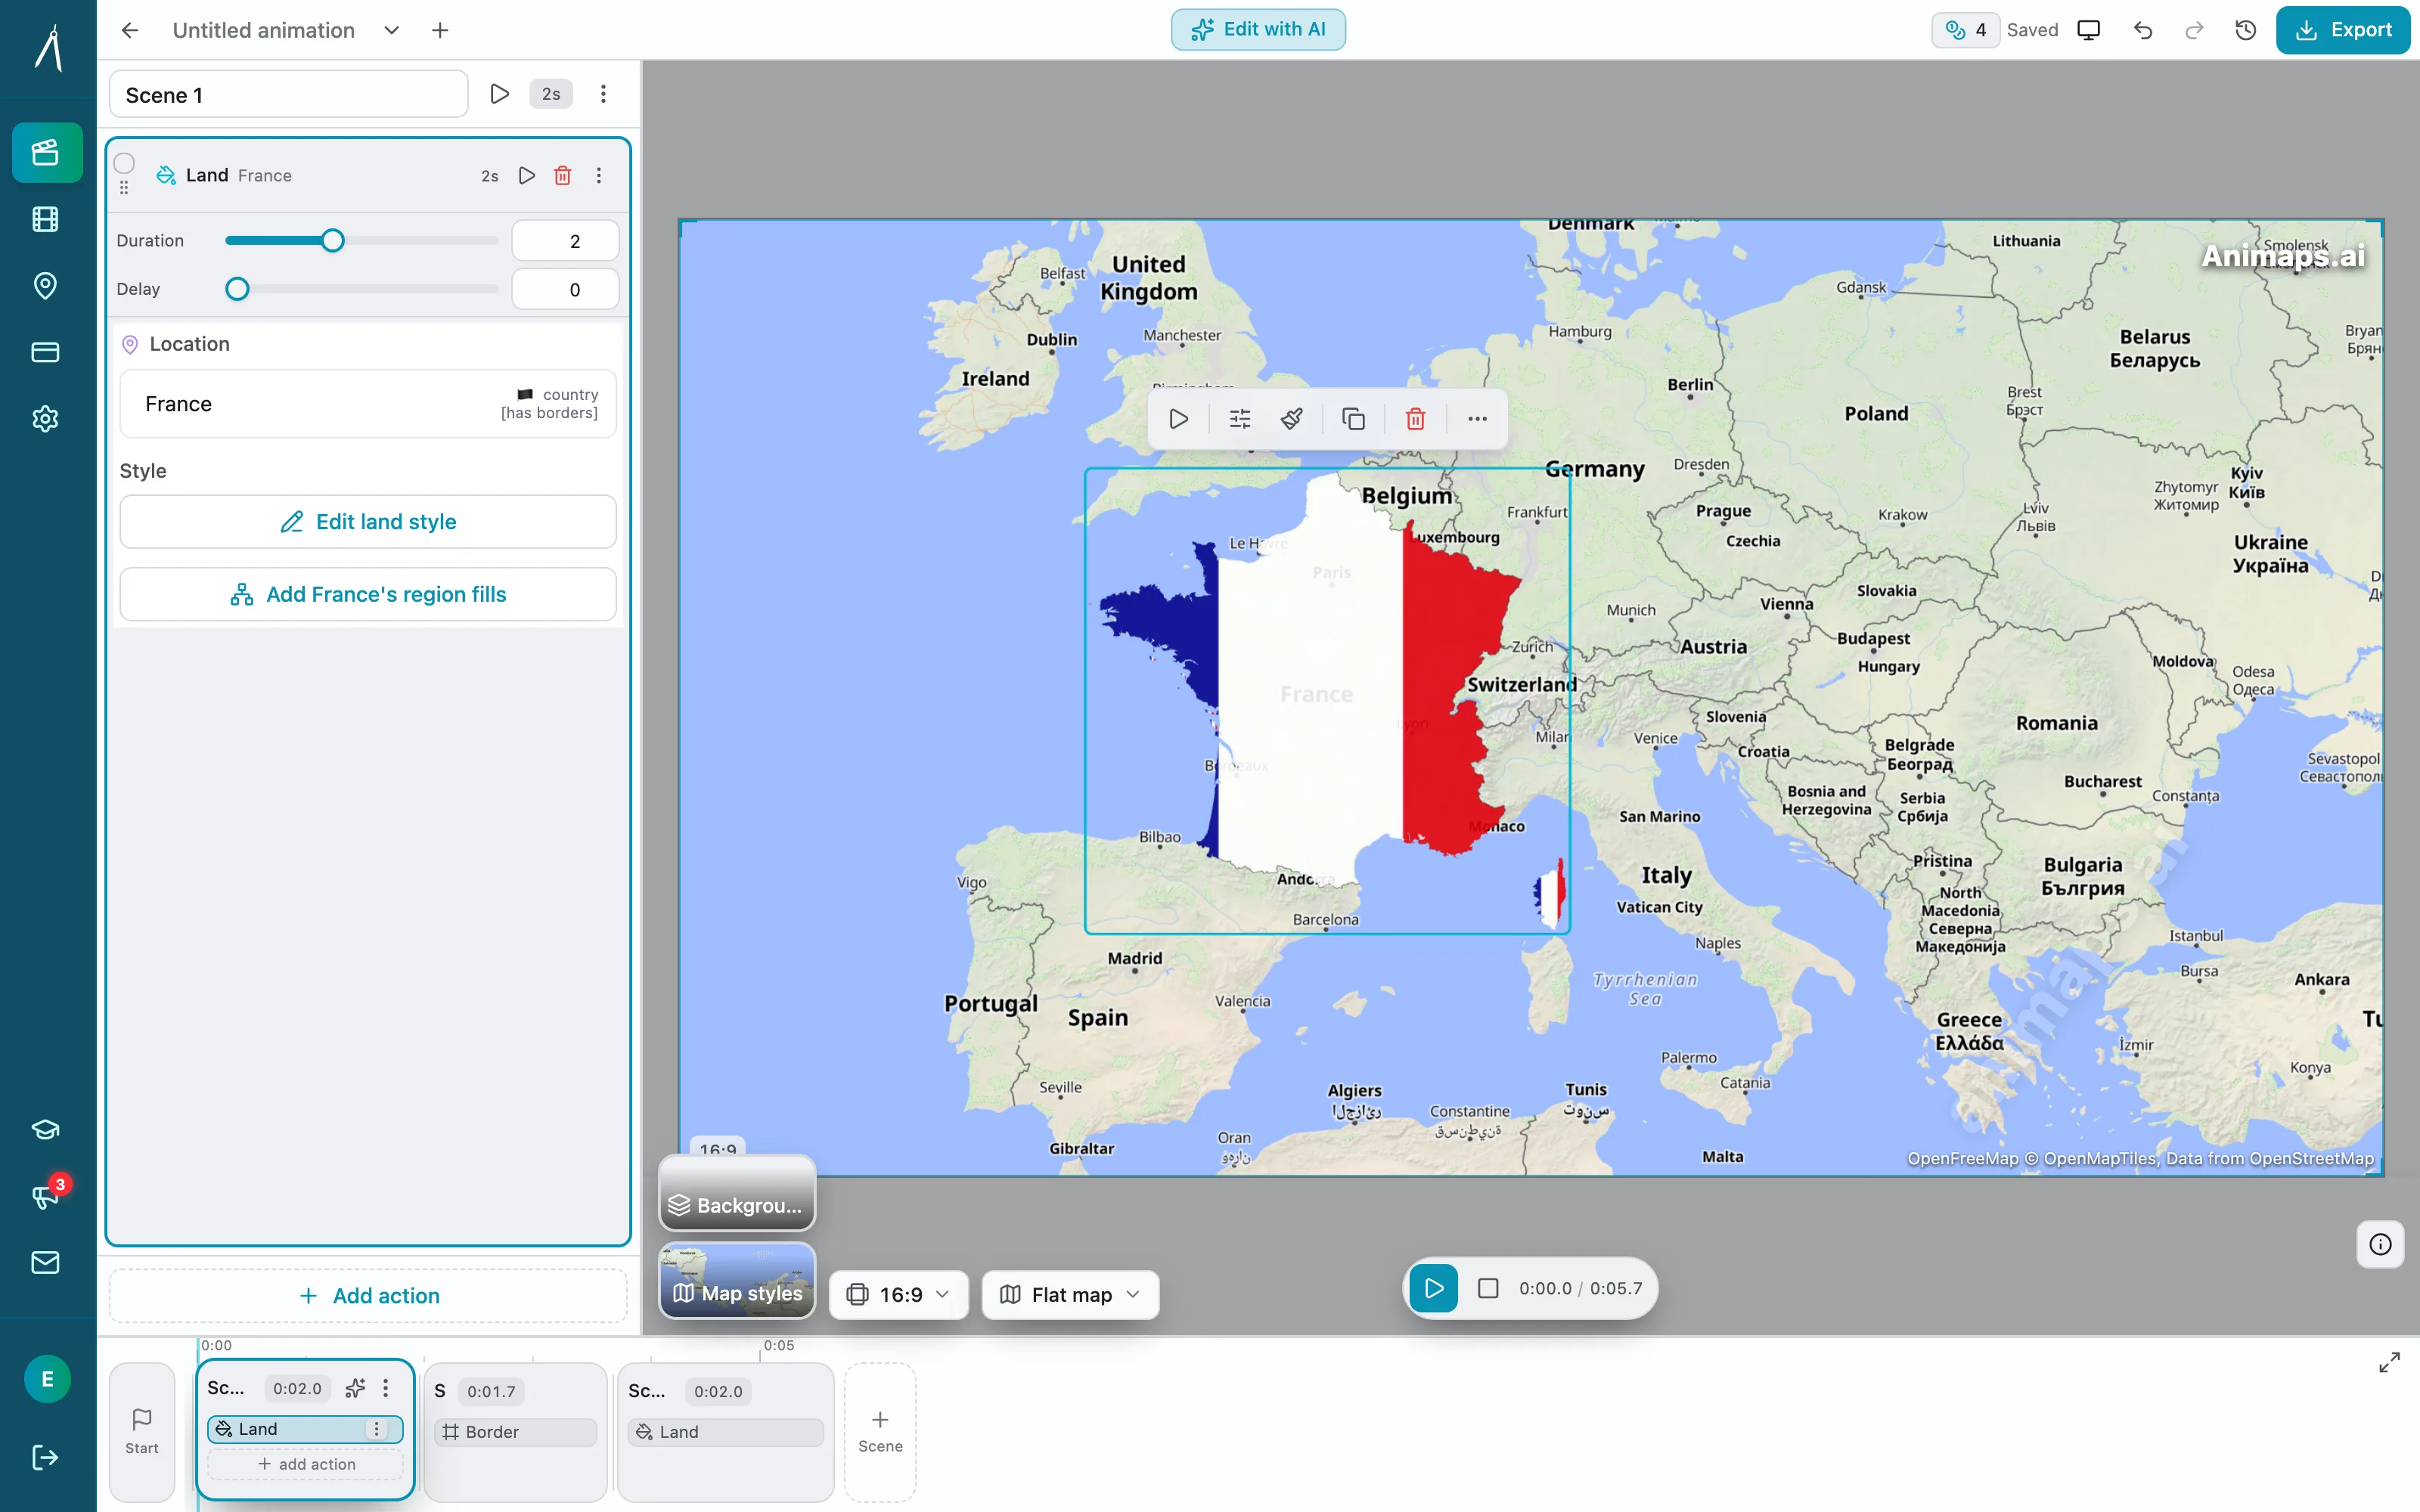
Animaps.ai’s natural language parser converts text commands into smooth camera moves, automated highlights, and production-ready timing without requiring keyframes.
Example Workflow with Animaps.ai:
User types: "Zoom to Europe, then highlight France and Germany, show their flags"
Animaps.ai creates:
- Smooth zoom to Europe
- Highlighted regions with crisp borders
- Flag overlays with fade-in animations
- Professional easing and pacing tuned for YouTube
- Exportable 1080p (or higher) video
Time investment: 60-90 seconds from description to rendered video.
Key Features of Animaps.ai:
- Natural language input (describe what you want, no coordinate hunting)
- Zero learning curve with guided prompts and presets
- Professional output quality (1080p-1440p, 30-60fps)
- Massive geographic database, icons, flags, and callouts built-in
- Multiple animation modes (zoom, pan, trace routes, highlight regions, drop markers)
- Built-in templates that match YouTube Shorts, Reels, and standard horizontal videos
- Editor overlays for polishing any detail
- Free tier for testing, premium plans for pro needs
Ideal for: Creators with tight deadlines, teams needing repeated map animations, and anyone who prefers storytelling over keyframing.
Why Animaps.ai: Mix natural language automation with optional manual adjustments, keep iterations fast, and treat every animation as a ready-to-publish video.
Method 2: Professional Studio Tools (High Control, Steep Learning Curve)
Adobe After Effects + GEOlayers 3 Plugin (The Industry Standard)
GEOlayers 3 is the plugin used by Vox, Johnny Harris, and other professional creators for designing and animating maps directly in After Effects, rendering custom maps from different online data sources with access to extensive geospatial databases.
Watch this tutorial on GEOlayers 3:
What Makes It Professional:
- Complete creative control over every element
- Access to multiple map data sources (Bing Aerial, ESRI, Natural Earth, Mapbox)
- Integration with After Effects' full animation toolkit
- Ability to create custom styles and branded maps
- Export 3D camera data for advanced compositing
The Investment Required:
- Software: Adobe After Effects ($25/month) + GEOlayers 3 plugin ($149-299)
- Learning curve: 20-40 hours to become proficient
- Time per animation: 1-3 hours for complex sequences
- Computer requirements: High-end machine for smooth performance
Best for: Professional creators, documentary filmmakers, channels with animation budgets, anyone needing fully custom branded maps.
One creator who mastered GEOlayers became known as "map king" and eventually got hired to create map animations for Johnny Harris's channel after producing detailed tutorial content.
Workflow Overview:
- Install GEOlayers 3 in After Effects
- Create new project and select map style
- Animate using keyframes and After Effects tools
- Add custom elements (shapes, text, data visualizations)
- Color grade and add effects
- Export final animation
Google Earth Studio + After Effects (Cinematic 3D Realism)
Google Earth Studio uses keyframes like industry-standard animation tools, allowing users to create orbits or fly from point to point using up to five templates, with no animation experience needed.
Official Google Earth Studio Tutorial:
Watch the official Google Earth Studio tutorials
What Makes It Unique:
- Photorealistic 3D satellite imagery from Google Earth
- Cinematic camera movements and orbits
- Track points for precise element placement in After Effects
- Free to use (requires approval, typically 1-7 days)
- Export as image sequences or with 3D camera data
Google Earth Studio exports files specifically for use in Adobe After Effects, with scripts that automatically set up your scene including creating comps, importing sequences, adding track points as georeferenced Null objects, and even adding text elements.
The Workflow:
Step 1: Animate in Google Earth Studio
- Sign in with Google account and request access
- Use Quick Start templates (Zoom To, Orbit, Point-to-Point, Spiral)
- Or create custom animations with manual keyframes
- Add track points for compositing elements later
- Render as JPEG sequence or MP4
Step 2: Enhance in After Effects
- Run the .jsx script file to auto-import everything
- Add text, graphics, and custom elements to track points
- Apply color grading and effects
- Export final video
Tutorial showing the complete workflow:
Best for: Creators who want photorealistic 3D maps, documentary-style flyovers, travel content showing actual terrain, real estate videos.
Time investment: 30-90 minutes per animation after learning the basics.
Method 3: Simplified Online Tools (Fast Results, Limited Customization)
Mapimator (Browser-Based Basic Features)
Mapimator is a tool to create basic map animations online, allowing users to create animated maps in just a few minutes with flexible map designs powered by Maplibre, with borders and camera movements.
Official Site: Mapimator.com
Key Features:
- No software installation required (browser-based)
- Multiple map styles and themes
- Add routes, markers, and camera movements
- Export as MP4 or social media formats
- Custom FPS and resolution settings
Pricing:
- Free plan for testing
- Paid plans for serious creators
- Cheaper than After Effects + plugins
Best for: Content creators who need basic map animations, or educators creating lesson content.
Multi.dev (Travel-Focused Simplicity)
Multi.dev is a powerful yet simple web-based application to build animated maps where users can type their starting location, add destinations, and the tool automatically draws routes with eight travel modes including airplane, bus, and train.
Official Site: Multi.dev
What It Does Best:
- Automatic route drawing between locations
- Multiple travel modes with vehicle animations (plane, car, train, boat, etc.)
- Minimalistic map themes
- Add photos at each destination stop
- Share via link or download video file
- GPX/KML file import for tracked routes
Multi.dev allows users to import GPX, KML or GeoJSON files from trackers like Strava, Gaia, and Komoot, add photos and location names to each stop, and choose transportation modes.
Perfect for: Travel vloggers, journey documentation, trip recaps, Instagram Reels/TikTok content.
Tutorial showing Multi.dev in action:
Anim8map (3D Travel Routes)
Official Site: Anim8map.com
Anim8map creates beautiful animated 3D travel maps where users can add photos for each leg of their route, with the system generating animations in both vertical format (perfect for Instagram Reels, TikTok, YouTube Shorts) and horizontal format (ideal for wider screens and traditional video platforms).
Unique Features:
- 3D globe perspective for dramatic effect
- Photo integration at each destination
- Vertical and horizontal format options
- Sea route support (maritime journeys)
- Background music library
- Gentle zoom mode for routes with many segments
Anim8map recommends higher animation speeds for engaging TikTok/Instagram/YouTube shorts, while slower speeds work well for traditional travel documentaries.
Best for: Travel content creators focused on social media, influencers creating Reels/Shorts, visual trip summaries.
Mapcreator (Broadcast Quality)
Official Site: Mapcreator.io
Mapcreator allows users to create impactful, dynamic video maps and animations in one tool with keyframes, transition time control, and aspect ratio customization, exporting as WEBM, MP4, PNG or JPG sequence with custom FPS settings.
Enterprise Features:
- HD, 4K, or 8K resolution options
- Broadcast-ready guidelines for TV
- Unlimited annotations and markers
- Custom brand styling (colors, fonts, icons)
- Parallax effects and 3D tilting
- Timeline-based control of element appearance
One graphics team that previously dedicated one day per week just to create maps now deals with map requests on the fly and achieves consistent style across all their work using Mapcreator.
Best for: News organizations, media companies, professional broadcasters, corporate presentations.
Method 4: Video Editing Software Integrations
Canva (Beginner-Friendly Design Tool)
Canva allows users to create map animations by searching for world map images in the Elements tab, adding GPS graphics for movement indicators, and using dashes to represent travel paths with animation effects.
How to Create Maps in Canva:
Step 1: Find Your Map
- Navigate to Elements tab
- Search "world map" or specific regions
- Choose from Photos section
Step 2: Add Movement Indicators
- Search "GPS" for location markers
- Duplicate for start and end points
- Use text dashes (–––) to create path lines
Step 3: Animate
- Apply animation effects to elements
- Use "Match and Move" transitions for zooming
- Adjust timing and transitions
Step 4: Enhance in Video Editor
- Export from Canva
- Import to CapCut, Premiere Pro, or Final Cut
- Use keyframes to add zoom effects
- Fine-tune timing and polish
Best for: Absolute beginners, quick social media content, creators already using Canva, simple location transitions.
Wondershare Filmora (All-in-One Video Editor)
Wondershare Filmora gives users full control over the map animation process and freedom to choose preferred export formats, with built-in travel map effects and stock footage integration.
Popular Map Animation Styles in Filmora:
Map animation styles include 3D globe zoom (dramatic opening starting with full world view zooming into specific location), GPS app style (clean white/gray map with moving blue line mimicking digital map apps), and vintage explorer style (sepia tones, faded textures, compass symbols, and stamps for historical feel).
Built-in Templates:
- Travel map effects
- Route animation presets
- Vintage and modern map styles
- Icon and vehicle animations
Best for: YouTubers who do all editing in one program, creators wanting unified workflow, those who prefer desktop software over browser tools.
Choosing the Right Tool for Your Needs
Decision Framework
If you need maximum creative control and have time/budget: → After Effects + GEOlayers 3
If you want photorealistic 3D terrain: → Google Earth Studio + After Effects
If you need quick professional results without software: → Mapimator or Mapcreator
If you're creating travel content for social media: → Multi.dev or Anim8map
If you're a complete beginner: → Canva or Filmora
If you want the fastest possible workflow with maximum versatility: → Animaps.ai, which combines natural language + Editor + templates
Cost Comparison Table
| Tool | Monthly Cost | Learning Time | Time Per Animation | Best Use Case |
|---|---|---|---|---|
| After Effects + GEOlayers | $25-50 | 20-40 hours | 1-3 hours | Professional custom work |
| Google Earth Studio | Free (+ $25 AE) | 5-10 hours | 30-90 min | Cinematic 3D realism |
| Mapimator | $10-30 | 30 minutes | 5-15 min | Quick professional maps |
| Multi.dev | $0-20 | 15 minutes | 3-5 min | Travel routes |
| Anim8map | $0-25 | 15 minutes | 5 min | 3D travel animations |
| Canva | $0-13 | 1 hour | 15-30 min | Simple beginners |
| Filmora | $50-80 | 3-5 hours | 20-40 min | All-in-one editing |
| Animaps.ai (AI-Powered Tool) | $0-19 | 0 minutes | 1-2 min | Natural language + templates for fast YouTube-ready maps |
Best Practices for YouTube Map Animations
1. Match Your Animation Style to Your Content
Documentary/Educational:
- Use subtle, professional movements
- Muted color palettes
- Clear labels and annotations
- Longer dwell times on locations
Travel Vlogs:
- Energetic, dynamic camera movements
- Bright, engaging colors
- Vehicle animations and routes
- Quick transitions
News/Current Events:
- Clean, authoritative style
- Bold highlights for key areas
- Data visualization integration
- Neutral color schemes
2. Timing and Pacing
General Rules:
- Hold on static maps for 3-5 seconds minimum
- Allow 2-3 seconds for zoom animations
- Use faster movements for social media (Shorts/Reels)
- Slower, more cinematic for long-form content
3. Sound Design Matters
Add impact with audio:
- Whoosh sounds for zoom movements
- Subtle "ping" for location markers appearing
- Ambient background music appropriate to location
- Voice-over explaining the journey/story
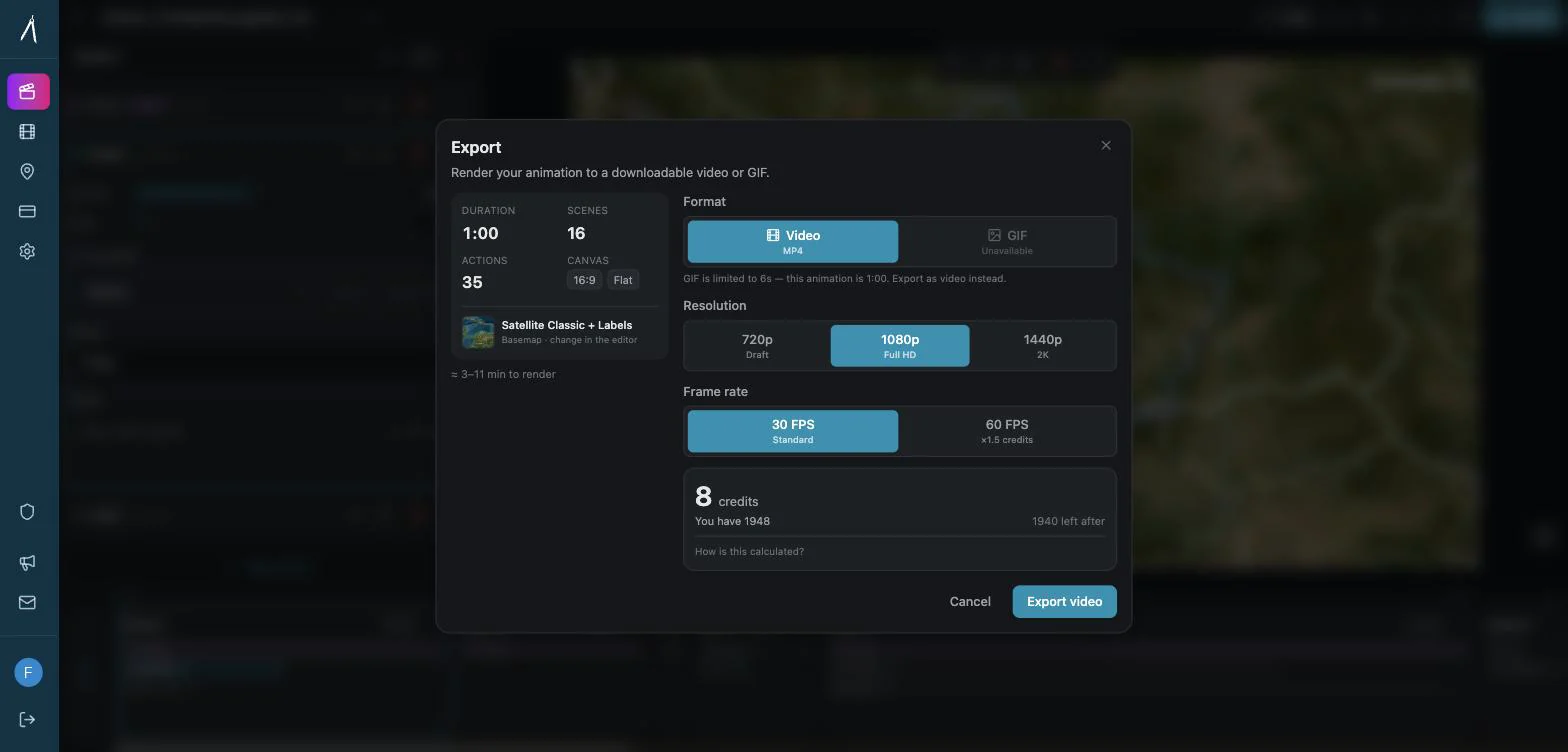
4. Export Settings for YouTube
Optimal specifications:
- Resolution: 1080p minimum (4K if your channel supports it)
- Frame rate: 30fps for standard content, 60fps for smooth motion
- Codec: H.264 (MP4) for best compatibility
- Bitrate: 8-12 Mbps for 1080p
5. Accessibility Considerations
Make your maps inclusive:
- Use high-contrast colors for visibility
- Add text labels that are large enough to read
- Include closed captions describing geographic movements
- Avoid relying solely on color to convey information
Common Mistakes to Avoid
❌ Moving Too Fast
Problem: Viewers can't process what they're seeing Solution: Allow 2-3 seconds per location, use slower easing
❌ Cluttered Maps
Problem: Too many labels, markers, and elements compete for attention Solution: Show only essential information, use animation to reveal progressively
❌ Inconsistent Styling
Problem: Different map styles within the same video look unprofessional Solution: Choose one map style and stick with it throughout
❌ No Context
Problem: Viewers don't understand the scale or significance Solution: Start zoomed out to show context, then zoom to details
❌ Ignoring Copyright
Problem: Using Google Maps screenshots without proper licensing Solution: Use properly licensed tools (GEOlayers, Earth Studio with approval, or dedicated map animation platforms)
Advanced Techniques
Creating Animated Routes
The reveal effect:
- Create your full route path
- Duplicate the layer
- Apply a mask that reveals progressively
- Keyframe the mask position to "draw" the route
- Add a moving icon (plane/car) following the path
Data Visualization on Maps
Showing statistics geographically:
- Use colored overlays for different data ranges
- Animate bars/graphs growing from locations
- Fade in numbers with smooth animations
- Create heatmaps with gradient overlays
Historical Timeline Animations
Showing change over time:
- Use color coding for different time periods
- Animate borders expanding/contracting
- Add date labels that update as animation progresses
- Show before/after comparisons with split screens
Workflow Optimization Tips
1. Build a Template Library
Create reusable templates for:
- Your most common camera moves
- Standard text styles and fonts
- Your brand colors and styling
- Frequently used locations
2. Use Keyboard Shortcuts
After Effects essentials:
- U: Show keyframes
- P: Position
- S: Scale
- T: Opacity
- Spacebar: Preview
3. Batch Your Work
- Create multiple animations in one session
- Export all at once overnight
- Maintain consistent style across series
4. Stock Up on Assets
Build a collection of:
- High-resolution map images
- Icon libraries (vehicles, markers, flags)
- Sound effects (whooshes, pings, ambient)
- Music tracks appropriate for different moods
Future Trends in Map Animation (2026 and Beyond)
AI-Assisted Creation
The trend toward AI-powered tools is changing how creators approach map animations, with systems that can understand natural language commands and generate professional output automatically.
Interactive Maps for YouTube
- Clickable markers (as YouTube adds more interactivity)
- Choose-your-own-adventure style maps
- Real-time data integration
AR/VR Integration
- 3D spatial maps for VR headsets
- Augmented reality overlays in videos
- Immersive geographic experiences
Real-Time Data Visualization
- Live traffic/weather animations
- Social media sentiment by region
- Stock market geographic visualizations
Case Studies: Successful YouTube Channels Using Map Animations
Johnny Harris (2.75M+ subscribers)
Johnny Harris is a filmmaker and journalist whose visual style blends motion graphics with cinematic videography to create content that explains complex issues in relatable ways, holding a BA in international relations and an MA in international peace and conflict resolution.
His approach:
- Uses GEOlayers 3 extensively
- Combines maps with on-location footage
- Creates custom data visualizations
- Maintains consistent branded style
Watch his process: [EMBED: "How I Make My Maps" by Johnny Harris - mentioned in multiple sources]
Vox (11M+ subscribers)
Their strategy:
- Professional map animations in every explainer
- Consistent visual style across videos
- Educational focus with clear storytelling
- Multiple animators on staff
Key takeaway: Vox's views increased from 50,000-150,000 to 1-3 million daily after incorporating more map animations, with maps helping them stand out, reach broader audiences, and turn complex data into compelling stories.
Resources and Learning Materials
Free Tutorials
- Google Earth Studio Documentation: earth.google.com/studio/docs
- Adobe After Effects Tutorials: Official Adobe channel
- Mapimator Help Center: Built-in documentation and templates
Paid Courses
- Skillshare: "How to Create Cinematic Map Animation with Google Earth Studio & After Effects"
- Udemy: Multiple courses on GEOlayers and map animation techniques
- YouTube channels: Boone Loves Video (specialized in maps), Flat Pack FX
Communities
- r/AfterEffects: Reddit community for AE users
- Creative COW: Professional forums for motion graphics
- aescripts.com forums: Specific to GEOlayers users
Asset Libraries
- Envato Elements: Travel map animation templates
- Mapbox: Custom map styling
- Natural Earth: Free geographic data
- OpenStreetMap: Open-source map data
The Bottom Line: Start Creating Today
Map animations are no longer optional for serious YouTube creators—they're expected. Map animations are taking over social media and travel channels because they bring clarity to travel stories, add professional feel, increase viewer engagement, and offer versatile use for road trips, flight paths, hiking maps, and more.
Your Action Plan:
Week 1: Choose Your Tool
- Assess your needs (speed vs. control)
- Consider your budget and learning time
- Download/sign up for your chosen platform
Week 2: Learn the Basics
- Watch tutorials specific to your tool
- Create 2-3 simple test animations
- Experiment with different styles
Week 3: Create Your First Real Animation
- Plan your map sequence on paper first
- Implement with your chosen tool
- Export and review
Week 4: Integrate into Your Content
- Add map animation to an actual video
- Publish and measure audience response
- Iterate based on feedback
The Tools Are Ready. Your Audience Is Waiting.
Whether you choose the professional power of After Effects, the simplicity of online tools, or the speed of AI-powered solutions, the barrier to creating stunning map animations has never been lower.
The question isn't "Can I create professional map animations?"
The question is: "Which tool will help me tell my story best?"
Ready to start creating?
Choose your path:
- Maximum Control: Start with GEOlayers 3 free trial
- Quick Results: Try Mapimator free plan
- Travel Focused: Create your first video on Multi.dev
- AI-Powered: Generate animations in seconds with natural language tools
The tools exist. The tutorials are available. The only thing missing is your story.
Related Articles:
Keywords: how to create map animations, YouTube map animations 2026, map animation tutorial, Google Earth Studio tutorial, GEOlayers After Effects, travel map animation, animated maps for YouTube, map animation tools, create animated maps online
Tags
Related reading
How to Create Stunning Map Animations for YouTube Videos
Map animations are one of the most engaging visual elements you can add to your YouTube videos. Whether you're explaining geography, history, travel routes, or global trends, animated maps capture your audience's attention and make complex information easy to understand.
Animaps vs GEOlayers: Specialized Tool or After Effects Plugin?
You're comparing Animaps and GEOlayers for creating map animations. Both are purpose-built for geographic content, but take fundamentally different approaches. GEOlayers brings maps into After Effects, requiring AE proficiency plus 20+ hours of plugin learning. Animaps is a standalone browser platform with zero prerequisites and a 30-minute learning curve. This comparison examines workflows, requirements, costs, and use cases.
Map Animation Tools: How to Create Animated Maps in 2026
A map animation tool turns a place and a sentence into a moving map video - camera flights, country borders, flag fills, routes, labels - without After Effects, plugins or keyframes. Here is what to look for, and what Animaps does.
Browse every article in the Animaps blog.